🧭Overview
Color: 🟡
Competence: 🔥🔥🔥🔥
Difficulty: 🧠🧠🧠
Type: 🗡️
Speed: 🐌
🎯Strategy
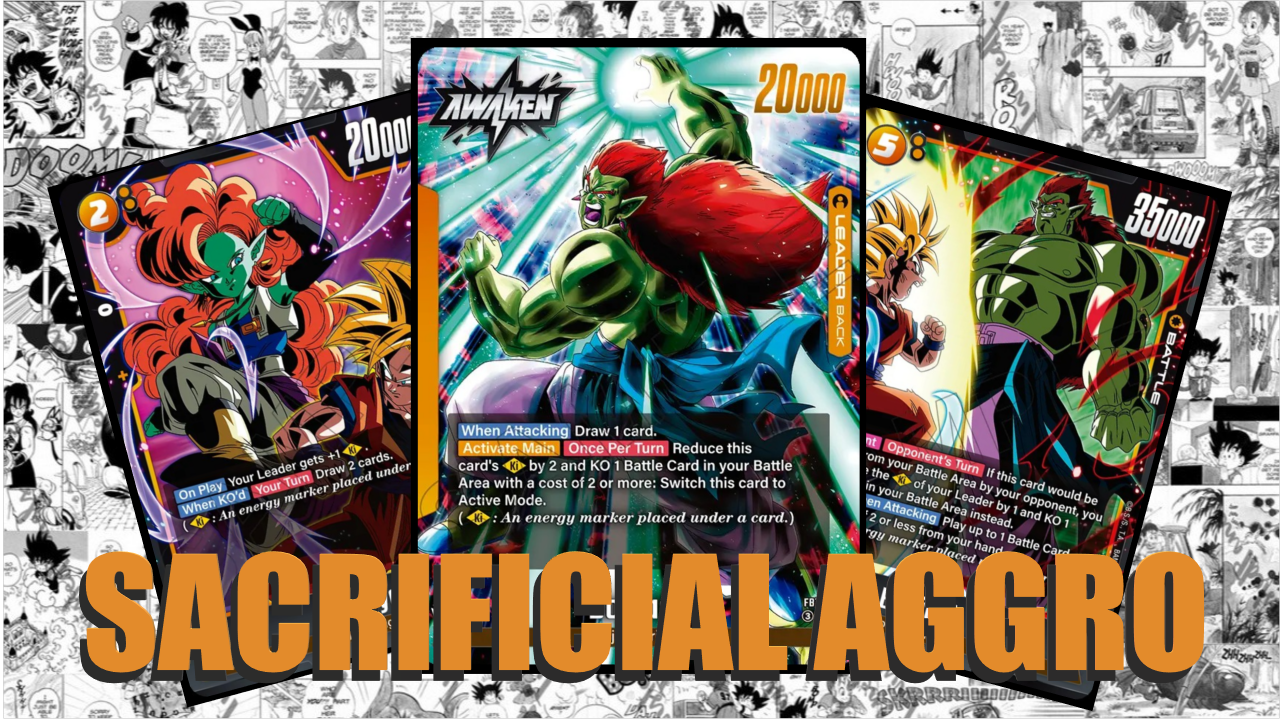
Boujack is all about aggression, and the introductory leader of the ki mechanic in yellow. We will reach awaken once he gets hold of 3 energy, either by playing two 2c cards after each other or by playing Gokua, who plays another 2c card as well. This is not the only time we play 2 cards for 1 though. Our deck builds on this swarm concept, and we really need to take advantage of this as we always need 1 leftover ki at the end of our turn to make our next turn viable, since multiple cards only work if we have 2 ki on our leader, while they only provide one ki (Slug, Boujack).
Our big, potential finisher turn is the 5th, where Boujack himself enters the board along with 2 other battle cards. He is also very hard to remove, keeping up the pressure the whole time.
This swarm mentality needs good drawing power though, or we will quickly run out of resources. We also need constant ki generation (which will come from the swarm itself), because our leader must use two for an additional attack, and with it an additional draw as well. That ability will also k.o one of our cards and Zangya will serve as the prime sacrificary drawing engine.
Board control is not really the strength of the deck, most we can do is freeze, however Slug is a perfect anti-thematic target for Loyal Shield or our leader ability, as he can attack and provide a ki an additional time doing that.
⚠️ Challenges
Not being able to remove anything from board is a huge drawback. No matter who our opponent is, they can safely implement their own strategy, as most we can do is attack multiple times, and have a decent handsize. That alone will cost us many games, as there are multiple cards, which impact the game, no matter whether they are stunned or not.
The other problematic factor is the duo concept. Most of our cards don't do anything on their own, they are linked to another card. Boujack is best played via the other Boujack to win a 30k additional swing. Slug is way better off the 2c, as it can be played by the 5c Boujack as well. Gokua is needed for turn 3 to acclaim that additional ki for the game, but he can only play 2c Boujack Gang cards. Missing one of these cards can ruin our whole game, as we play an aggro deck, and to win with it we need consistent oppression, which will be denied without our perfect curve.
🧱 Core Cards
Zangya – the drawing engine, our deck shambles without her, as we need to find card combinations for our strategy to work, and for that we need as many cards as we can get
Boujack – a really powerful finisher, and quite flexible at it
💡 Tips
given all the card in hand/board, the best sequence is to kill Gokua with Loyal Shield before the leader swing, as this way the leader can attack 30k twice
play a 2c ki generator card on turn 2, as we need a leftover, and every following turn we will consume just as many ki-s, as we can produce
Slug is a really good target for all our k.o effects, but only once per turn
🎥 Gameplay
Digital
FB10
Free
a4925eb1-d0b6-4b8b-92fc-35b7a1632d88 - ss3ku; platinum (youtube)
9e5cf281-4677-4d3b-8be6-379a57471c2b - turles; platinum (youtube)
9711e44c-b2f2-4ab5-a403-6763347a254c - turles; gold
132c26db-69d4-4756-89da-54ebbe8d4c98 - boujack; gold
9211bc1e-22ee-47f7-bed5-c0428e85ac66 - kinameku; silver
8b25af7a-da6b-4125-be24-509cd32366ca - kinameku; silver
8683d108-aa74-4638-abaf-d51edf970ffa - brolybr; platinum (youtube)
f7617172-2496-437f-b85c-99a4e7ee613b - stackgito; master (youtube)
b9427f01-7c60-466b-bbe0-b93f97d6a90f - boujack; platinum
62c5de33-4c9c-4d74-8281-e2f574bc774f - gohancolo; silver
34e586d2-e191-4435-bd20-c7a5003aa88f - beasthan; master (youtube)
Youtube
📃 List
FB10 - Bojack - Deck - Dragon Ball Super: Fusion World | DeckPlanet | DeckPlanet
💬 Personal Notes
I had mixed feelings about this deck all along. I was happy, that Boujack joined the game, but after that it was ruined for me by most of the cards featuring Gohan. After actually playing with it, first I liked it quite much, because there was some fun sequencing going on with the deck, and I like that part (Gomah was my favorite leader for a time), but the more I played with this deck, the more irritated I became by it.
Having zero answers to what my opponent is doing is really not my thing, and this deck doesn't involve other moves, than hitting the opponent's face. Adding to this that I've felt, that my matches were ruined by not drawing the good cards was a miserable experience.
🔑 Legend
Icons
Type: 🗡️ Aggro | 🏹 Midrange | 🛡️ Control | 🔗 Combo
Tempo: 🐌 Slow | 🐇 Medium | 🦅 Fast
Difficulty
🧠: Beginner-friendly, perfect even for your first game.
🧠🧠: Easy; requires attention to a few small details, but follows a simple and clean strategy.
🧠🧠🧠: Requires learning, but becomes routine after sufficient practice.
🧠🧠🧠🧠: Requires a deep knowledge of both your own deck and the opponent's; demands situation-dependent decision-making.
🧠🧠🧠🧠🧠: Demands perfect play in both decision-making and execution through complex sequences.
Competitiveness
🔥: Unplayable; does not perform under any circumstances.
🔥🔥: Underperforms; highly dependent on favorable circumstances.
🔥🔥🔥: Performs well; perfect for casual play, but at a clear disadvantage against dominant decks.
🔥🔥🔥🔥: Suitable for competitive play; in theory, a skilled player can hold their own against anything.
🔥🔥🔥🔥🔥: Dominant; a typical "boogeyman" deck that everyone hates to face.
Glossary
Aggro: A strategy that ignores the opponent's game plan with the goal of ending the match as quickly as possible, in this case through relentless attacks.
Midrange: A strategy that seeks a middle ground, attempting to balance the tempo. It tries to slow down fast decks and outpace slow decks. Board control is a vital tool here.
Control: A strategy entirely focused on neutralizing the opponent's plays. It settles in for a long, slow game where the goal is to bleed the opponent out of resources.
Combo: A strategy that aims to win (or at least cause a radical shift in the game state) through the synergy of specific cards, often appearing to come out of nowhere. The goal is to gather the necessary components and fulfill the prerequisites as quickly as possible.