🧭Overview
Color: 🟢
Competence: 🔥🔥🔥🔥
Difficulty: 🧠🧠🧠🧠
Type: 🏹
Speed: 🐇
🎯Strategy
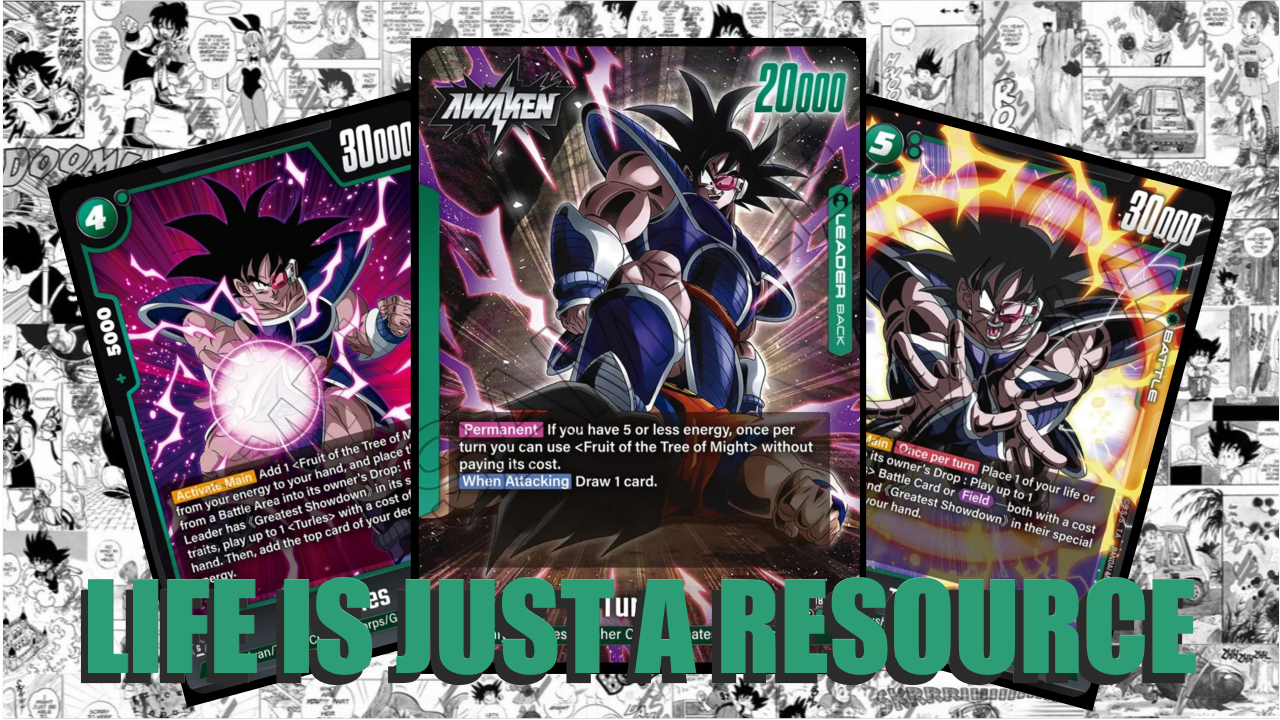
This leader is quite flexible in its build, the core archetype is about finding the fruit and retrieve it turn after turn to boost a card with +15k in a battle, which is most of the time for defense. Beside that there is a vast range of card we could add and use, that should derived from the meta. This particular build is an aggro variant, which establishes and threatens with a huge board if left unchecked. The way it works is quite similar to how a yellow deck operates. We will cheat with energy and play multiple cards per turn for free, while also manipulate our energy in green fashion in the meantime, resulting up to 5 big swings from an empty board.
Finding the fruit was always a huge problem for this deck, as we desperately need it for our deck to function, and our searching options were really not great. The problem hasn't gone away, but it's a bit more manageable. We should still mulligan for the fruit, but instead of maniacally searching for it, we gained a new alternative. We could take life to find it, especially because after awakening we can play it for free, which is a great ramping and defensive tool at the same time. Also we got a bit of a breathing room, as we're not doomed if we haven't found it by turn 3, since the new threshold is turn 4 due to our new card.
Our first three turn is not particularly deep or exciting, the most we can do is to handle the board with our new Turles card. For 4 energy though we can play the other Turles, which does the same thing, as the older did, but way better. 30k attacker, plays the 5c active, ramp one to negate the following deramp from the 5c, gives back the fruit, so we don't need Goku and the tree anymore, and doesn't cost us a card in hand for a single energy more. This is our new bread and butter move, as we can have a free 3c on board afterwards.
We can win the game in multiple ways. One is to win by board domination, no decks can handle the offensive from 2-3 of the above mentioned sequence, especially if one of those stayed on board. If we start the turn with 5 energy, we will have 2 surplus after our sequence, and Cell Jr. could give a final push after grabbing back the Instant Kamehameha, resulting another 30k base attacker. The other way is the traditional double strike all in. Starting the turn with 6 energy, we will have 3 surplus energy at the end of our sequence, which is exactly the cost of the scr, and we have plenty of options to go down to 2 life.
⚠️ Challenges
Aside of being wrecked by not finding the fruit, we lack the removal tools most new decks have. Kill Driver was printed before the power spike of FB09, so we can k.o up to 5 cost cards, which is useless after the early-mid game. Additionally we have some great cards, which could be used, but a lot of potential cards have a 0 combo, which hurts the archetype a lot.
Also we have a very unfortunate situation, that the promo used in this build has been released in Japan, and on digital, but it's not printed in English yet, so not all cards could be used in physical form. They are need to be replaced with something else.
🧱 Core Cards
FB08-072 Fruit of the Tree of Might - the cards, which makes the deck. We are happy to have all pieces in our hands, as sooner or later we will find use for it
FB08-059 Turles – plays a 3 cost after deramping every single turn
FB10-062 Turles – the new best way to play the 5c Turles, it's basically a fusion of the old Turles and Goku in a way
💡 Tips
Great Ape Gohan only works, if we already had a 1c Gohan in the drop. Comboing it off at the same time doesn't trigger the when k.o-d ability
most of the time we share a fruit in our and our opponent's turn, usually we're better off keeping it for defense unless we need to close the game in the turn
never put multiple fruits to the energy given more of them are in our hand. We need one in our energy, but they are a great ramping tool around turn 3
we should always use the fruit as energy, when playing a card, because we will get it back, and we don't want to pick up an active energy
📈 Meta
Cards
FB10-061 Turles: I underestimated this card, but it does a great job at turn 3. For some decks, it kills a 2c card (brogeta, boujack, beasthan, ss3ku, etc.), and it some cases it punishes 1 cost plays (stackgito)
FB08-060 Daiz: there are some decks, which have a hard time dealing with wide boards, and getting rid of multiple blockers are impossible for them (beasthan, stackgito). It's also an alternative attacker, optionally played on turn 1.
Matchups
VS Ss3ku
In this matchup it doesn't worth it to push awaken too much, as ss3ku will help us in that regard. We need to win by board and value, but we shouldn't just waste attacks. Going down to 2 life is very threating to ss3, so they will defend every attack. The fruit will be essential for defense, as we also should avoid going down to 2 life, unless we are certain we can defend an all in. By the end of their turn with the last attack we can go down to 2 though, as we can use the new Goku to heal back to 3.
VS Brogeta
3c Turles is great at disrupting their evolve, and Kill Driver can kill the 5c cards. Beside that we shouldn't rely too much on our board, as it will be eradicated every single turn, but we have the tools to survive long enough and reduce enemy life to 2 to finish them off with a double strike attack. Blockers aren't bad, as we can block some pre-evolve attacks with them.
VS Stackgito
3c Turles punishes this deck the most, and being a 4 life awakened leader helps us a lot as well. We can remove anything beside the scr Vegito, and we should focus on establishing our blockers on the board. Vegito has only one way to remove them, which is the extra, so they are relatively safe, as there will be other cards they need to handle. We should use our blockers to negate the big attacks, and never go down to 2 life.
VS Beasthan
Our strategy is very simple here. We need to be aggressive, and clear the board with effects and extras. We need to have at least 2 blockers before they do their combo, because they can't handle 2 cards per turn. If we have 2 blockers, 3 life, we can't die to their combo, and possibly they won't live long enough to commence a new one.
VS Boujack
This game comes down to value, and it's not favored for anyone. Actually the two decks work in a very similar fashion. One great tech we can use is to have Gohan: Youth cards on our board, and not comboing them off. We can hurt their Slug sequence a lot this way, which could result in our victory.
VS Genkiku
The strategy is very similar to how we want to defeat beasthan. We need to establish blockers on the board, because only the extra can remove them. However if we have multiple down, they can't do anything with it, while we can hit them with everything on our end.
🎥 Gameplay
Digital
FB10
Free
0e2a30fe-c004-483a-88aa-af1932f0a013 - synron; platinum
e838aa30-46fa-4bbf-a2b3-095263cacf3f - genkiku; gold (multiple misplays)
c2da8bd1-00a2-4f6e-b5df-b547992ce414 - brogeta; gold (youtube)
e83caf72-d51a-4f9c-9422-80c4812bac19 - burnhan; platinum
1b37f9ff-4502-4347-8432-ee0d9d83ed6f - stackgito; silver (youtube)
51e85adf-2cb2-414f-ba6e-1d6ab9fea6ab - ss3ku; platinum (youtube)
abd421a0-b596-4b89-91ef-e2ad14263420 - boujack; master (i forgot about gohan youth)
8f65976e-d1c6-4c91-90f4-a9b3228795b6 - turles; platinum (youtube)
53fa4a22-c0aa-4055-8895-897adb695d15 - brogeta; silver
3b203be4-e471-4c61-92ac-ba9843289158 - beasthan; platinum (youtube)
9b16c54d-2d1a-4b85-ad81-b6b973cf2598 - piccolo; platinum
580051c3-b8c6-46d2-8ab0-a23576df7692 - shenron; platinum
f7cf8dd3-d248-4a41-b449-5164c0d3c479 - shenron; platinum
b0443738-6b57-41f7-ab4e-a82c935f2202 - shenron; platinum
FB09
Free
6e5faeca-c7af-49f9-8f1e-4d454f0dd25a - kinameku; platinum
FB08
Free
4580b086-fe6e-4c80-ba29-2f9d87126430 - gotenks, platinum
3f0842b9-b1a5-47d2-8258-9cd0f6c5e68d - bardock; platinum
d931fb68-fa86-4d9c-85ea-4f1e082e4bf9 - turles; god
af10e1be-c653-48bd-a02e-59ed16a47dbd - teenhan; silver
f63f6ea0-ccc2-413e-bc2a-fcad63f6cf50 - grieza; gold
f39ba2c4-0ab0-4ed7-9db0-4291f90cb6df - topku; platinum
177bae89-783d-43de-8ca3-c9744970842c - glorio; gold
e247649c-9c32-430e-8455-a45832e60085 - ssbgeta; master
Ranked
b0be2450-5bdb-4807-b032-b399432a656b - bardock; god
a69b0179-00fb-4a61-a3f0-1afbd4a11d8f - jrku; platinum
179b5464-80ce-464c-ae44-d17ae79a72e3 - gotenks; platinum
3f0638ad-6e71-444b-9b36-c2b07ccd83a9 - bardock; platinum
1aba9aa3-8bee-4440-ac40-4be537a15b42 - burnhan; master
f7f93187-a4b0-4b8e-acd8-7e0b9cbdd949 - frieza; platinum
a4beb68d-e4c9-4133-bcae-8b48b585946d - glorio; platinum
96c9cc6b-1fcf-4394-9ab2-e24fb47af40a - daimageta; platinum
e8a10dd7-b120-4755-9dcb-b1fe1e6807f6 - giblet; platinum
Youtube
📃List
https://www.deckplanet.net/fusion_world/deck/3bafd560-8114-4d30-bc2d-eadca288393e
💬 Personal
Turles was my favourite leader in FB08. I like aggressive green, and one of my favourite archetype is life juggling. It could be my favourite in FB10 as well given all the cards are released in physical form. It won't happen probably in FB10 though.
I believe the deck got better, and not on the competitive level, because that's not for discussion, the new 4c is crazy. It's more interesting now, and gives more exciting decisions. I played the 3c Goku in FB08, because that was the fun card in that build. The new Goku is even more fun though, especially because getting the fruit back from energy is not a headache anymore. Optionally taking life like crazy this way is a really good mechanic, because I need to fulfill the prerequisites for it, and when I do, I can create some really good sequencing. It's thinky, it's competent, but a bit random as well, which will hold it back in tournaments.
🔑 Legend
Icons
Type: 🗡️ Aggro | 🏹 Midrange | 🛡️ Control | 🔗 Combo
Tempo: 🐌 Slow | 🐇 Medium | 🦅 Fast
Difficulty
🧠: Beginner-friendly, perfect even for your first game.
🧠🧠: Easy; requires attention to a few small details, but follows a simple and clean strategy.
🧠🧠🧠: Requires learning, but becomes routine after sufficient practice.
🧠🧠🧠🧠: Requires a deep knowledge of both your own deck and the opponent's; demands situation-dependent decision-making.
🧠🧠🧠🧠🧠: Demands perfect play in both decision-making and execution through complex sequences.
Competitiveness
🔥: Unplayable; does not perform under any circumstances.
🔥🔥: Underperforms; highly dependent on favorable circumstances.
🔥🔥🔥: Performs well; perfect for casual play, but at a clear disadvantage against dominant decks.
🔥🔥🔥🔥: Suitable for competitive play; in theory, a skilled player can hold their own against anything.
🔥🔥🔥🔥🔥: Dominant; a typical "boogeyman" deck that everyone hates to face.
Glossary
Aggro: A strategy that ignores the opponent's game plan with the goal of ending the match as quickly as possible, in this case through relentless attacks.
Midrange: A strategy that seeks a middle ground, attempting to balance the tempo. It tries to slow down fast decks and outpace slow decks. Board control is a vital tool here.
Control: A strategy entirely focused on neutralizing the opponent's plays. It settles in for a long, slow game where the goal is to bleed the opponent out of resources.
Combo: A strategy that aims to win (or at least cause a radical shift in the game state) through the synergy of specific cards, often appearing to come out of nowhere. The goal is to gather the necessary components and fulfill the prerequisites as quickly as possible.